It’s a scenario many of us are familiar with: you’ve purchased a new trailer or perhaps you’re upgrading an existing one, and now it’s time to ensure that the door is securely fastened with a reliable latch. Ensuring a proper latch installation not only keeps your belongings safe but also ensures a smoother journey without the constant worry of the door swinging open.
Installing a trailer door latch might seem like a daunting task, but with the right tools and steps, you can achieve a professional finish in no time.
Moving forward, we will break down the installation process into digestible steps. By following these, even someone unfamiliar with the task can achieve a sturdy and reliable latch installation.
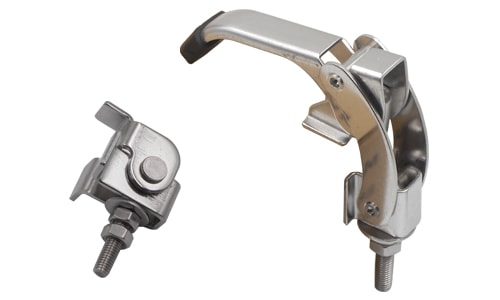
Gather Necessary Tools and Materials
Before diving into the installation process, you’ll need to ensure that you have all the necessary tools and materials at hand. This not only speeds up the process but also ensures that you aren’t left scrambling midway.
For a standard trailer door latch installation, gather a drill, appropriate-sized drill bits, screws, the latch kit, a pencil or marker, measuring tape, and safety equipment such as gloves and safety glasses.
Positioning the Latch
Positioning the latch correctly is critical to ensure that the door securely closes and locks. It would be frustrating to complete the installation only to find out the door doesn’t align properly.
Firstly, hold the latch against the door at your desired height, ensuring it’s level. Use a pencil or marker to mark the screw holes. If your latch has a separate catch or strike plate, position it on the door frame opposite the latch and mark its screw holes as well.
Drilling and Fixing
Once you’ve marked the positions, it’s time to drill. Using the appropriate drill bit, carefully drill holes where you’ve marked, ensuring you don’t drill too deeply or widely.
With holes prepared, align the latch and catch or strike plate with the holes and begin fixing them in place using screws. Ensure each screw is tight, but be careful not to over-tighten and strip the threads.
Testing the Latch
With the latch installed, the next logical step is to test its functionality. Close the trailer door and see if the latch catches properly and if the door sits flush against the frame.
If the latch doesn’t catch properly, you may need to make minor adjustments. This could involve repositioning the catch or strike plate or tightening/loosening screws slightly.
Maintenance and Care
Like any component exposed to the elements, a trailer door latch will benefit from regular maintenance. This ensures longevity and continued smooth operation.
Periodically check for any loose screws and tighten them if necessary. It’s also wise to lubricate the latch mechanism with a suitable lubricant to prevent it from becoming stiff or jammed.
Conclusion
Installing a trailer door latch is a straightforward process that requires careful planning and the right tools. By following the outlined steps, you can ensure a secure fit that will keep your trailer’s contents safe during transit. Regular maintenance will further prolong the latch’s lifespan and performance.
You might also be interested:

